- Stronger Customer Relationships
- +1-949-878-7411
- ramana@varasi.com
Embedding Google reCAPTCHA v2 in Salesforce Lightning Component to Increase Security

Salesforce uses multi-factor authentication to increase security around your Salesforce setup. But you provide access to customers, partners and other external users through community and other web forms making it vulnerable to attacks. These access points should also tighten security in a similar way. In this article we show how you can increase security of your custom Lightning component by embedding Google reCAPTCHA v2.
Let us start with the basics of Google reCAPTCHA. You can read more about reCAPTCHA here – “reCAPTCHA is a free service that protects your website from spam and abuse. reCAPTCHA uses an advanced risk analysis engine and adaptive CAPTCHAs to keep automated software from engaging in abusive activities on your site. It does this while letting your valid users pass through with ease.”
You need to register and configure reCAPTCHA before integrating it on Salesforce side.
Register & Configure reCAPTCHA
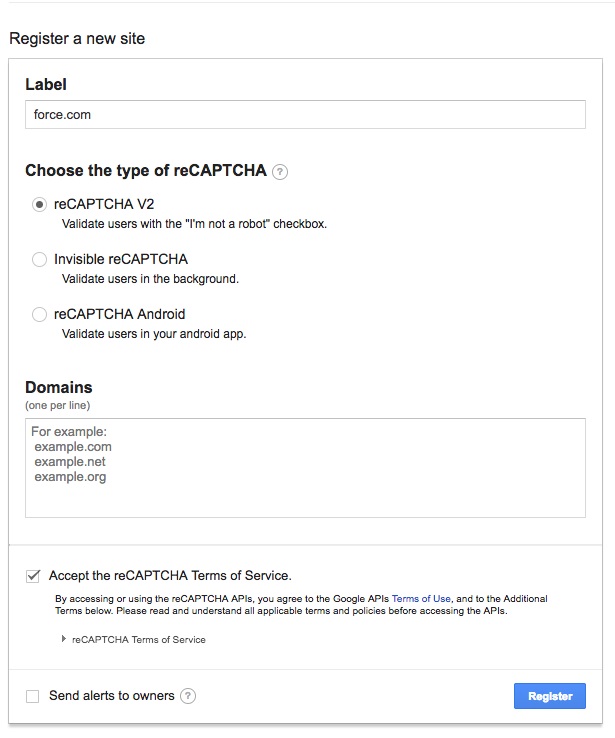
First step is to register for a Site Key in the reCAPTCHA admin panel which will allow Google API for reCAPTCHA to validate your site. You will need to use your Google account credentials at this site and follow below steps:
- Enter the Label
- Choose reCAPTCHA V2 radio button
- Set the Domain name where you want to host reCaptcha. In your case, force.com
- Accept the reCaptcha Terms of Service
- Set the Owner details i.e. your email address and mark checkbox if you want alerts of any suspicious traffic and misconfiguration errors.
- Click on Register button
Once you click on the Register button, you will have your Site Key pair to use in your Lightning Javascript code.
Screenshots
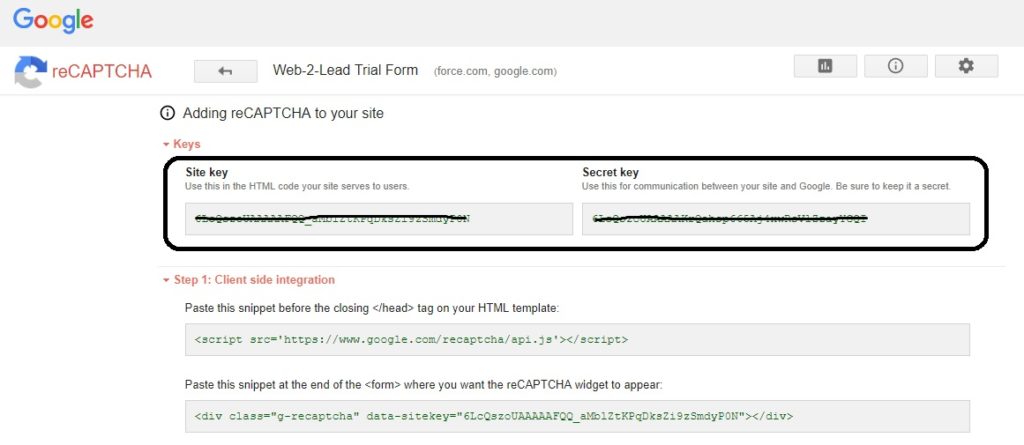
The above screenshot shows the Site Key and Secret Key that you will receive after registering for reCAPTCHA. We will use it in the Visualforce page code. Now let us embed reCAPTCHA in Salesforce.
Salesforce Customizations
On Salesforce side there is a Visualforce page and a Lightning component. The main Lightning component will show the reCAPTCHA and a button that will be enabled when the reCAPTCHA validates that the user is not a bot. We are building the Lightning component using a third party component and Salesforce recommends one of the two isolation mechanisms (LockerService and the Lightning Container Component) that allow you to use them securely and avoid security exploits. The Visualforce page is needed to make it compliant with the LockerService isolation mechanism.
Visualforce Page
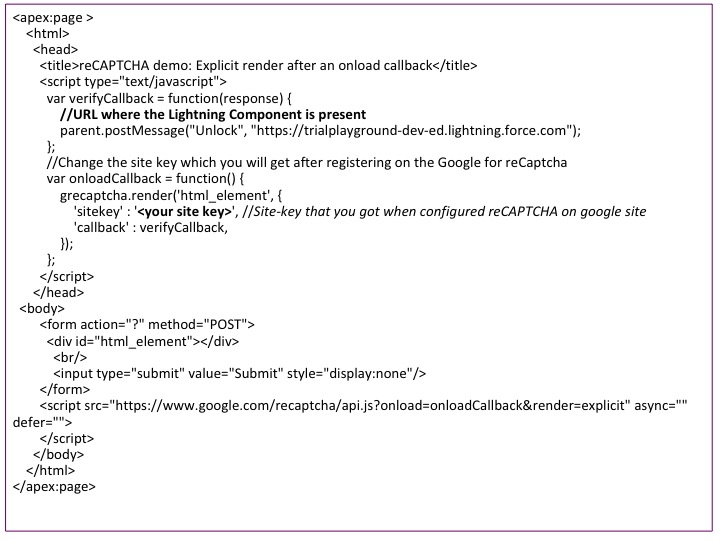
Below are the important tags from the Visualforce page:
- The script tag which loads the reCAPTCHA using the function onloadcallback. This callback function is executed once the script finishes its load. This function is important for two reasons:
- It defines the sitekey that we received when we configured the Google reCAPTCHA on the admin site (Refer to the Register & configure reCAPTCHA section above)
- It defines the callback to be invoked when the reCAPTCHA validates that the user is not a bot.
- form with simple Submit button which is hidden from the User. This is a necessary requirement for the reCAPTCHA to work.
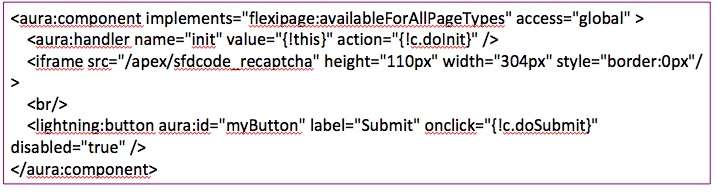
Lightning Code
The Lightning component displays a button which will be disabled until the reCAPTCHA validates that user is human and not a bot and after validation it will show the alert message. The important part here is an iframe for the Visualforce page which will actually bring the reCAPTCHA on the Lightning component.
Lightning Component
Lightning JS Controller (Client-side)
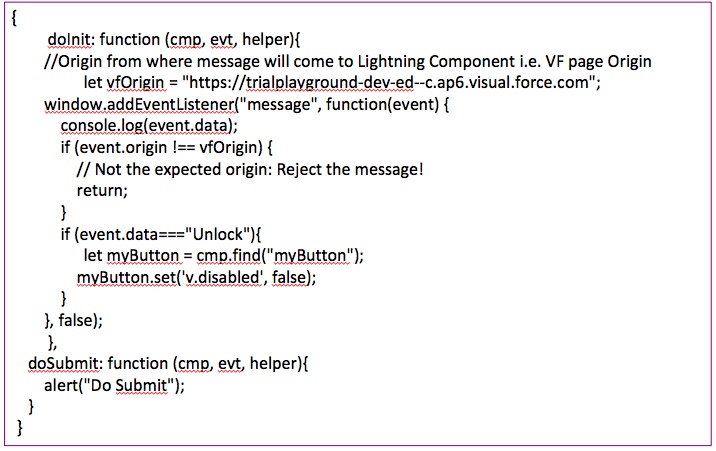
Height and Width parameter on the iframe in the component defines the size of the Visualforce page within the Lightning component.
On the Client-side controller, the important part is the window.addEventListener which establishes the communication with the Visualforce page. This code does all the processing of enabling the button when it receives the Unlock message from the Visualforce page.
Here is how the lightning component will look

This lightning component is not limited to login. It can be added to any page and you can assign any action you want e.g. Save a record to the database OR Display a list of record on the page. To implement that, you have to make changes to the function that is called on the Click of the button. In the above code it is the doSubmit function.
Team Varasi


